
Introduction
Here we will show you how to add a simple loot box and then query it from your game.
First you will need to sign up for a free BotGame API account and then proceed to follow the tutorial through.
Creating the Entity
A Loot Box should be classed as an Entity.
So firstly, head over to the ‘Entities‘ page once logged into your dashboard…
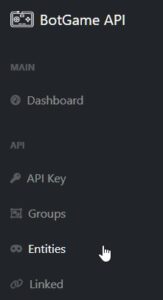
Once the Entities page has loaded up click on the ‘Add Entity’ button
![]()
An ‘Add Entity’ dialog should popup. Enter the Entity name. For this tutorial, we will call it loot_box_1…
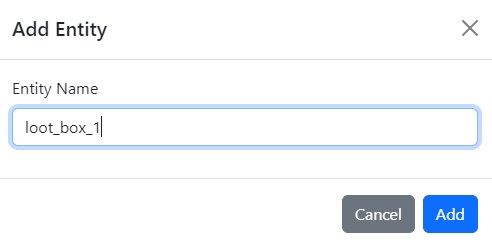
Click the ‘Add’ button.
This will now create a new Entity called ‘loot_box_1‘ inside your Entities.
Create Attributes
Our first Loot Box needs some attributes. Attributes are what defines the entity. In this instance, this particular loot box, we want to give it some goodies inside for the player to collect. Each goodie is an attribute.
Now we can either have objects inside that contain only 1 preset, or we can have multiple. For example, if it’s coins, we can simply create an attribute called ‘coins’ and give it a value of 15. This means the player will collect 15 coins from this loot box.
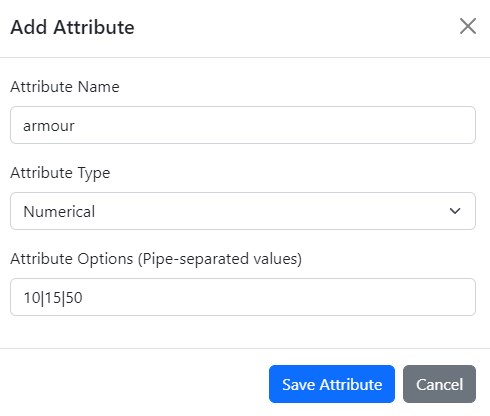
However, if we want the player to collect some armour and we want to assign a random value to this armour, we can do so by creating an attribute named ‘armour’, numerical and having multiple options like ’10|15|50′ all separated by pipes.
Let’s create an Armour attribute with random values now.

Click on the ‘View’ attributes button for loot_box_1.
This will take you to the attributes page, where there are no attributes yet…

Click on ‘Add Attribute‘ and a dialog will popup. For the Attribute Name, we will use ‘armour’, for the Attribute Type we will use ‘Numerical’ and for the Attribute Options we will define 3 possible values… 10, 15 and 50. Like so…
Click ‘Save Attribute‘.
This will now be saved into the entity ‘loot_box_1‘.

Query the Entity
Now, let’s query the object from your game. For the sake of this tutorial, we will use C# (Unity).
We will query the object using the API and our API Key.
The return result will be in JSON.
Make sure you have UnityWebRequest and JsonUtility namespaces included.
Use the UnityWebRequest.Get method to make a GET request.
Send the request and handle the response.
Replace <your_api_key> with your actual API Key.
Unity Code
using UnityEngine;
using UnityEngine.Networking;

public class BotGameAPIExample : MonoBehaviour
{
    private string apiUrl = "https://botgameapi.com/app/bga";
    private string apiKey = "<your_api_key>"; // Replace with your API key

    void Start()
    {
        // Call the QueryEntity method in the Start method
        QueryEntity("loot_box_1");
    }

    void QueryEntity(string entityName)
    {
        // Build the URL with the parameters
        string url = apiUrl + "?api_key=" + apiKey + "&entity_name=" + entityName;

        // Start the UnityWebRequest
        StartCoroutine(GetEntity(url));
    }

    IEnumerator GetEntity(string url)
    {
        // Create the UnityWebRequest
        using (UnityWebRequest webRequest = UnityWebRequest.Get(url))
        {
            // Send the request
            yield return webRequest.SendWebRequest();

            // Check for errors
            if (webRequest.result == UnityWebRequest.Result.ConnectionError)
            {
                // Log an error if there was a connection error
                Debug.LogError("Error: " + webRequest.error);
            }
            else
            {
                // Log the response if successful
                Debug.Log("Received: " + webRequest.downloadHandler.text);

                // You can deserialize the JSON response using JsonUtility or any other JSON library
                // Example: MyEntityClass entity = JsonUtility.FromJson<MyEntityClass>(webRequest.downloadHandler.text);
            }
        }
    }
}
And here would be the typical JSON response back to your game or app:
{
    "entity": "loot_box_1",
    "attributes": [
        {
            "attribute_name": "armour",
            "attribute_type": "Numerical",
            "attribute_options": "10|15|50"
        }
    ]
}
Here, the response is a JSON object that contains the entity and attributes properties. The entity property is a string that indicates the entity name, and the attributes property is an array of attribute objects.
Each attribute object in the attributes array includes three properties:
attribute_name: A string that indicates the name of the attribute.attribute_type: A string that indicates the type of the attribute (e.g., “Numerical”).attribute_options: A string that contains the options for the attribute, separated by the|character.
In this specific example, the loot_box_1 entity has one attribute named armour with the type Numerical and options 10, 15, and 50.
Entities can contain unlimited attributes and options.
Updating in Real-Time
Once you have published your game with it linked to BotGame API, you can edit the attributes of the entity at any time to change values etc.
Once you edit an entity / attribute, it will instantly update in real-time across all your games (once it queries again).
Further Examples
For more examples in different programming languages, see our code examples page.